READ THE FULL DOCUMENT BEFORE YOU START!
NOTE: A how to build your own reed will be added by Neubit soon!!!!!
Supplies needed for the Security Power Switch
30-gauge Kynar wire
Soldering Iron (nothing more then 15 Watt)
Solder (.015 size works best)
Flux
Read Switch – or - Window/Door Alarms (got mine at Wal-Mart) See the end for part #s
Advanced soldering and PSP disassembly Skills
Access to the Following Tutorials
PSP Slim & Lite Disassembly Tutorial by T3KN1K4L
PSP Phat Disassembly Tutorial by Kenshinffx
Refer to T3KN1K4L’s PSP Slim & Lite Disassembly Tutorial for removing the face plate on the slim only.
Refer to Kenshinffx’s PSP Phat Disassembly Tutorial for removing the faceplate off the phat PSP and some other parts.
Removal of the Face Plate
NOTE: Follow the correct tutorial for your PSP type, to remove the face plate then stop and refer back to this Tutorial.
Power Board removal for the Slim.
What you will need to do is remove the power board.
On the Slim you will need to remove the black screw at the top of the power board and then remove the flexible circuit cable by lifting the black bar as shown here. PICTURE Take caution when messing with this black bar. You don’t want to break it. Gently lift up on the bar to open.
At this point you should have the power board out of the slim. You are now ready to skip to the section labeled Switch Install
Power Board removal for the Phat.
Ok with the Phat PSP refer to Kenshinffx’s tutorial. Basically, you will need to remove the button bar and the LCD Screen and then the cage that holds the LCD in place to be able to access the power board fully.
Once that stuff is out of the way you will be able to access the power board. When removing the power board take note, there is a flexible circuit cable that needs to be removed from its holder on the bottom of the power board. To do this lift on the bar that rests on top of the flexible circuit cable holder then slid out the cable.
NOTE: Taken from Kenshinffx’s document. “Then you remove the ABXY Power switch but carefully making sure that you get the little black nub out of the power switch on the outside. Note: when you remove that always take special care to know where that black nub is for the switch it’s the easiest thing to break if you aren't careful when you reinstall the power board always make sure that nub is in the outer area of the switch correctly Before you push the board into place. J R told me about how he took all day doing a huge LED mod and everything thing worked. Broke the switch off reinstalling it. Made the whole thing useless. I've broken the switch once. And I will not do it again”.
At this point you should have the power board out of the Phat. You are now ready to go to then next section.
Switch Install
OK so if you bought a reed switch go to the section labeled Install, if not and you bought a Window Alarm then continue reading this section.
Note: Not every window alarm is the same try to get the same one I got. If you can’t find one, then order this from Mouser.com
1. OK start by removing the batteries from the Window Alarm.
2. Then remove the screws (on the unit that I used there was one in the front and one in the back).
3. Separate the front and rear panels.
4. Carefully remove the circuit board.
5. Look for the read switch, which should look like this.
6. Remove the reed switch by de-soldering or cutting (if you cut make sure to leave yourself enough room to solder your wires on to.
7. Get rid of everything but the reed switch and the little bar that came with the window alarm.
8. Remove the magnet from the little bar by unscrewing the two screws and removing the cover. Then bang the bar against a hard surface to remove the magnet.
Install
So this will be the same for both types of PSPs but I’ll include pictures.
1. To install the switch take 2 pieces of Kynar wire of equal length about three inches or so and strip the ends of the wire.
2. Hold the two pieces of wire together and twist then so that they look like this, also It will help your install and make things look cleaner.
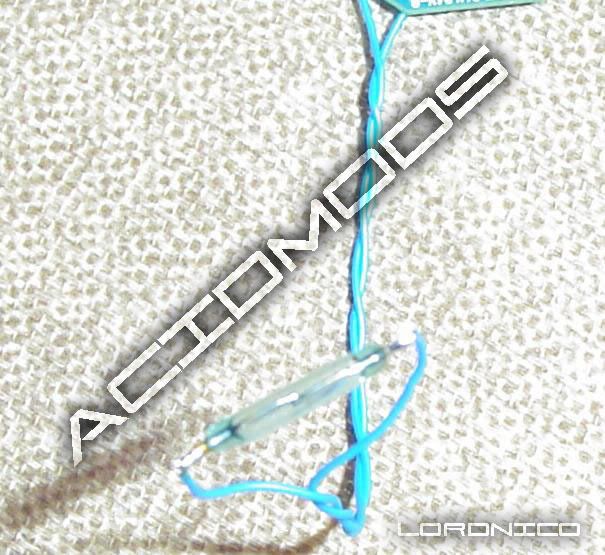
3. Then solder the wire onto the ends of the reed switch. (I would normally use heat shrink on the exposed endpoints but I was out of it when I took the pictures. So I will apply tape to the areas around the switch).
4. Next you will solder the wire onto the power switch
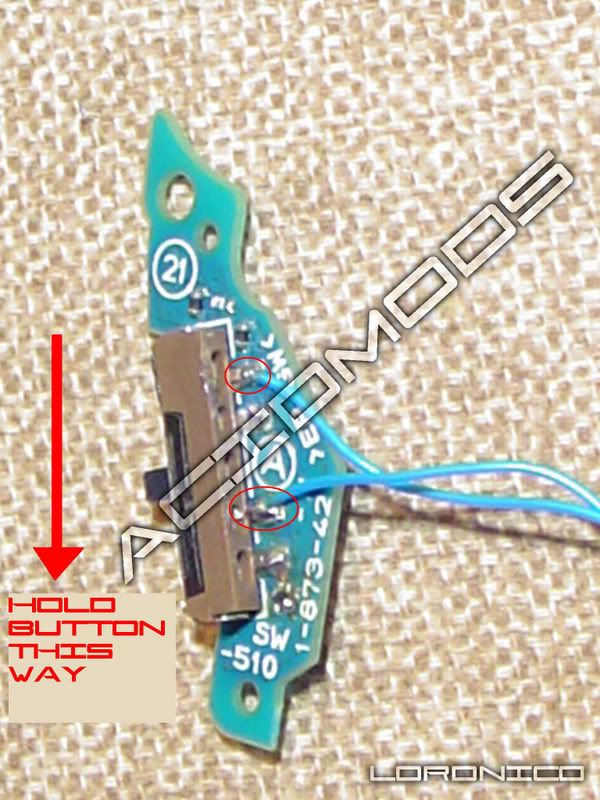
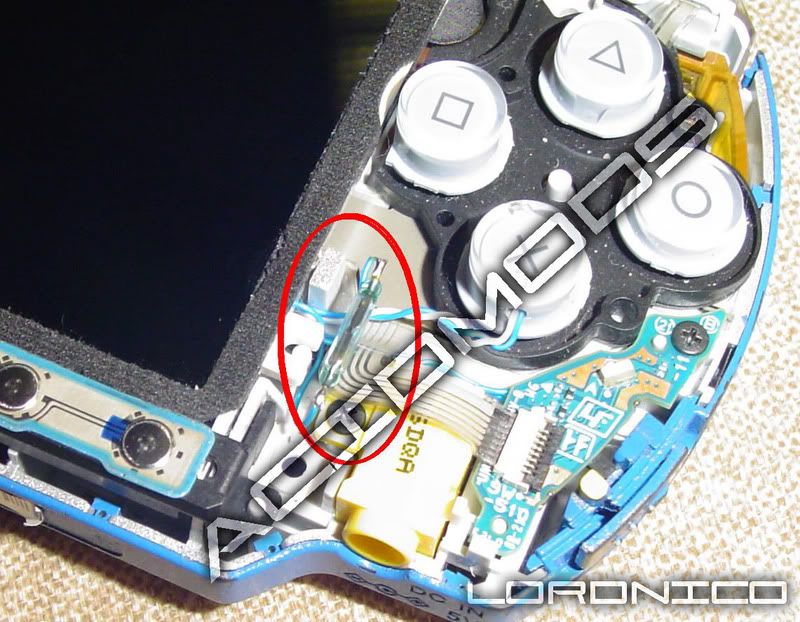
5. For the slim solder the wire here and here.
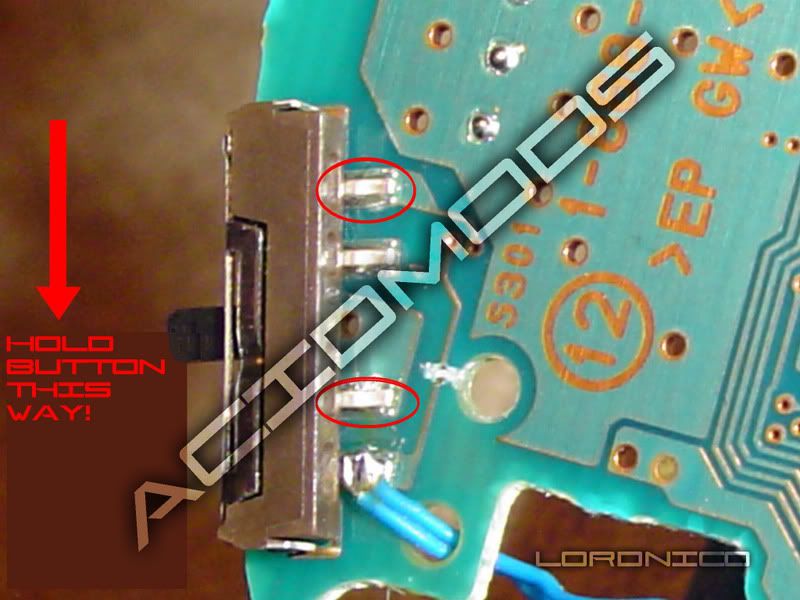
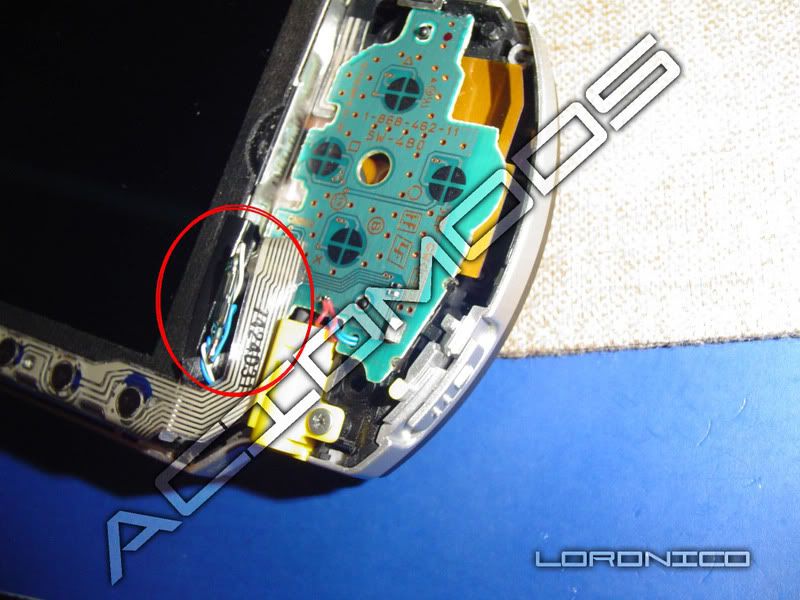
6. For the Phat solder the wire here and here.
7. Then install the power boards back into the PSP
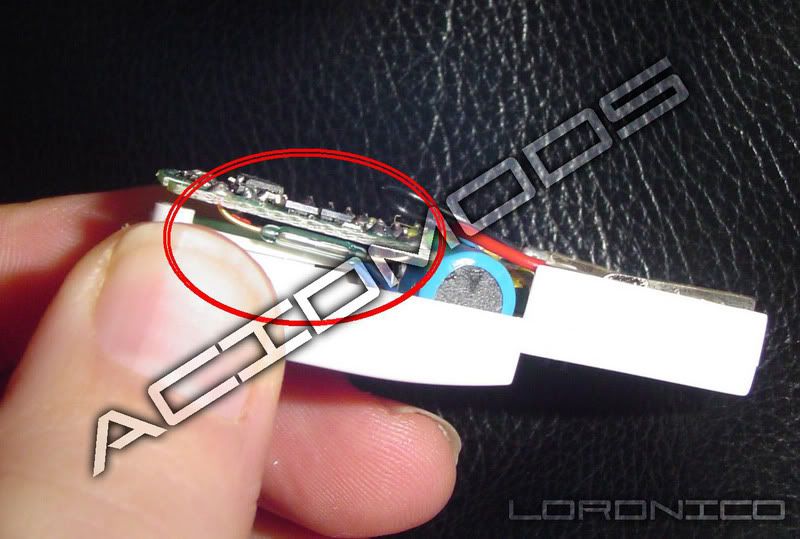
When installing the power boards you want to ensure that the new wires you just installed are not going to get in the way of the existing charger port wires when reinstalling the power board. Also you are going to be installing this new switch parallel to the lower right hand side of the LCD screen as shown here.
NOTE: if you don’t use heat shrink on your endpoints put tape on the exposed metal surfaces to prevent shorts!
8. Put your PSP back together again but don’t install the face plate yet.
9. Make sure that the contacts in the glass reed switch are horizontal. Then place your battery in the PSP and using a magnet wave it above your new reed switch. The PSP should power on.
10. Turn off your PSP and make any final adjustments to the reed switch so that the reed switch is as close to the face plate as you can when you put the face plate back on, without interfering with the LCD screen or the buttons.
Optional
To use this mod as a security switch you can do a few things!!!
1. Unclip the metal from the sides of the power switch and remove the metal part and the black nub (be careful not to break the switch off the power board).
2. Remove the power button from the shell (the piece your thumb presses when you turn on your PSP).
3. Cut off the black nub part of the switch that moves when you press up on the power button.
4. On the Phat De-solder the power trace on the power switch or cut it (pictures coming, not sure if this can be done on the slim more investigation need. Sorry I wanted to get the tutorial up for the masses.
No comments:
Post a Comment